 |
|
| |
 |
Movers |
|
 |
 |
| |
Movers (user controlled) (2) |
| |
|
|
|
 |
|
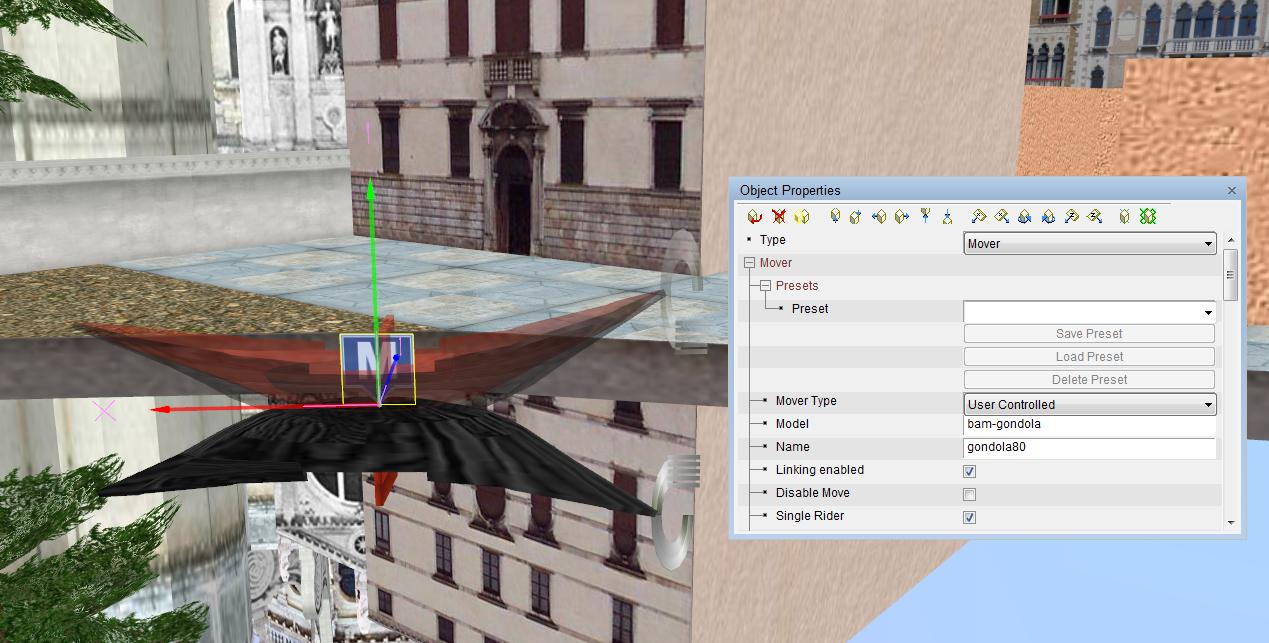
| 6. making a mover with multiple objects |
| A mover can also consist of several objects instead of using only the mover-object itself. If you want make a mover with several objects, then all object parts need to be linked with the mover, by using the "create link"-command. |
| As an example, we use again the gondola mover, and now we will make a second gondola object , which will be used as a reflection of the gondola mover in the water. This means that we will "link" this "reflection"-gondola object to the gondola mover. We start creating the reflection-gondola object and build it upside down under the gondola mover object. Now select again the gondola mover and give it a name : |
| Name : gondola80 |
| Linking enabled. |
| Now select the "reflection"-gondola object which we will link to the gondola mover by giving it the same name (gondola80) and we type this action command : |
| create link gondola80 |
| Now it is possible that the gondola has disappeared ....but when going into building mode, you will see that the gondola is still there. Now select again the mover object and in the mover options, you activate "linking enabled" again,( if this was not the case). And the reflection-gondola is now linked to the mover. |
|
 |
|
|
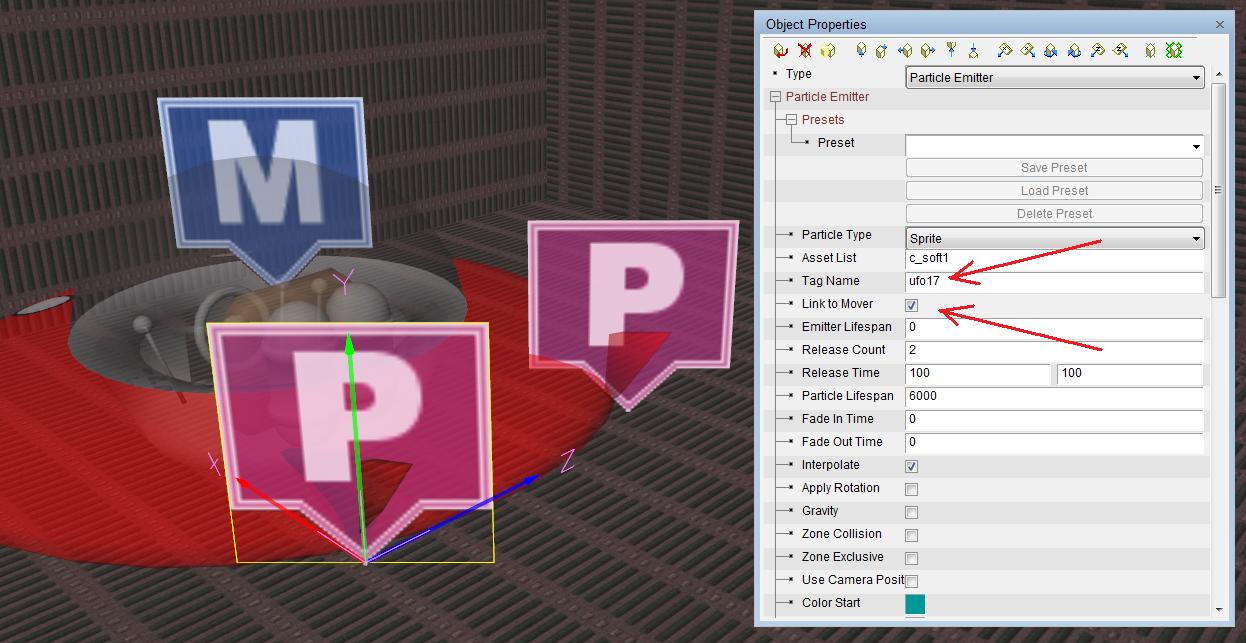
| 7. Adding Particle emitters |
| Particle emitters (=PE's) can also be attached to the mover . This way you can create a trail of smoke, fire or light when driving with the mover. |
| In this example we add 2 light-PE's to the ufo-mover. For the ufo-mover we will first add in the mover object properties window : |
| Name : ufo17 |
| Linking enabled. |
| Now we add the Particle Emitters of light. If you still need to create the PE's, then you can teleport to the world AWFX and copy the example that suits for you. Selecting the properties box of a PE happens in the same way as selecting the properties box of a mover: you first select an object in the neighbourhoud to get into building mode and then you select immediately the P-icon. Now we see the PE-properties box and we add there : |
| Tag name : ufo17 |
| Link to mover |
|
 |
|
|
 |
 |
|
|
| 8. using several movers with multiple objects |
| If you create several movers with multiple objects, then you need to give a different mover name for each mover, otherwise the object will be linked to the wrong mover: In this example we already have the ufo mover with the name ufo17 , now we copy this mover and create a mover with the name ufo18 |
| Name : ufo18 |
| Linking enabled. |
| The objects linked with that second mover (ufo18) must have the same mover name, in this case the particle emitters objects must have the name ufo18. We go the the PE properties box and change the settings. |
| tag name : ufo18 |
| Link to mover |
| In you have forgotten to select "link to mover" , then you will see that the PE has disappeared ....but when going into building mode, you will see that the PE is still there. Go again to the PE-properties and add "link to mover". If you have forgotten to select "linking enabled", then the PE's will not move when you will fly with the ufo. |
|

|
|
|
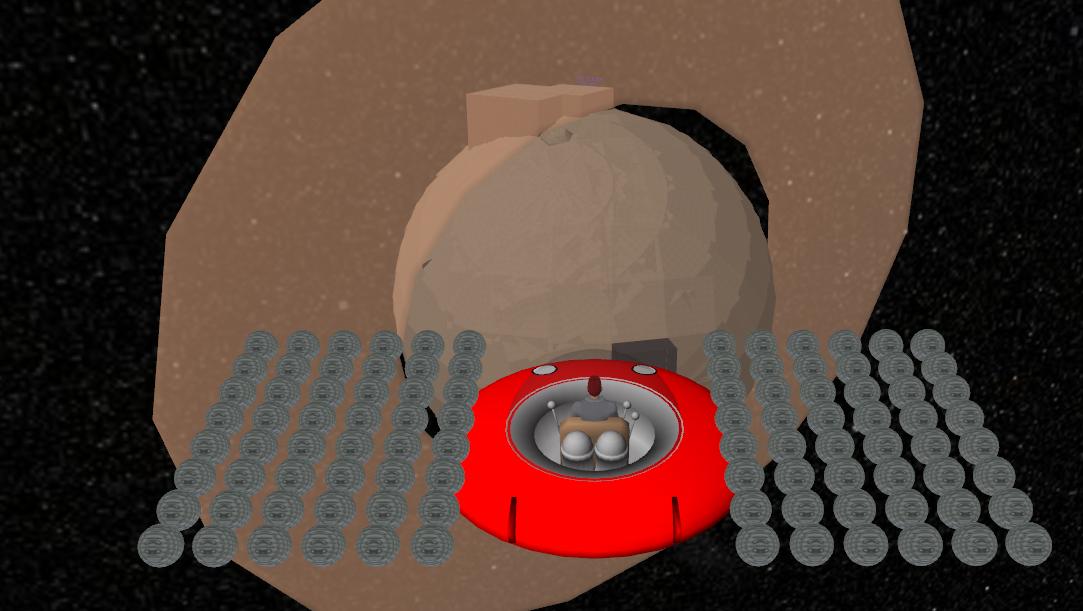
| 9. mover limitations |
| AWSchool 143S 148E : mover behaviour |
| * you can only use 1 mover at the same time |
| * movers don't respond to any action commands except for the "link" command |
| * the link name of the mover consists of only alphanumeric lowercase letters plus 0-9 |
| * you can't link objects with the "move"-command to a mover |
| * you can't link objects with the "visible"-command to a mover |
| * you can link a lot of objects to 1 mover (on the picture we have 96 ball-objects linked to 1 ufo mover), but there is a limitation to the maximum distance of objects that you can link to a mover. In some cases you will be able to use objects at the distance of more than 50 meters , thinking you can build a huge ship or space vessel. But in some cases, the AW program will reset this distance automatically to 10 meters (from each side of the mover). If you uncheck and reselect "linking enabled" or when re-entering the world, then the linked objects at a larger distance will not move anymore with the mover and sometimes they even disappear. In other cases, if you re-enter the world again, the AW-program will accept all linked objects again, and it will work again like it should. But there is no certain rule about that. |
|
 |
|
|
 |
 |
|
|
| 10. multiple users on 1 mover |
| There is the possibility to navigate with several users upon 1 mover, in this case you need to go to the object properties window of the mover and select: |
| Single rider : desactivate this |
| Add on bump : v |
| Now automatically "add on bump" will be activated instead : this means , that after the first user has clicked upon the mover , then the second user must bump against the mover to join as a passenger. |
| When you use multiple users, then there is a 10 seconds delay before the mover starts to move. This is the time needed for the users to join the mover ride. |
| |
| 11. using sound |
| You can also add a sound , this can be the sound of the mover vehicle, or a melody. |
|
|
|
|
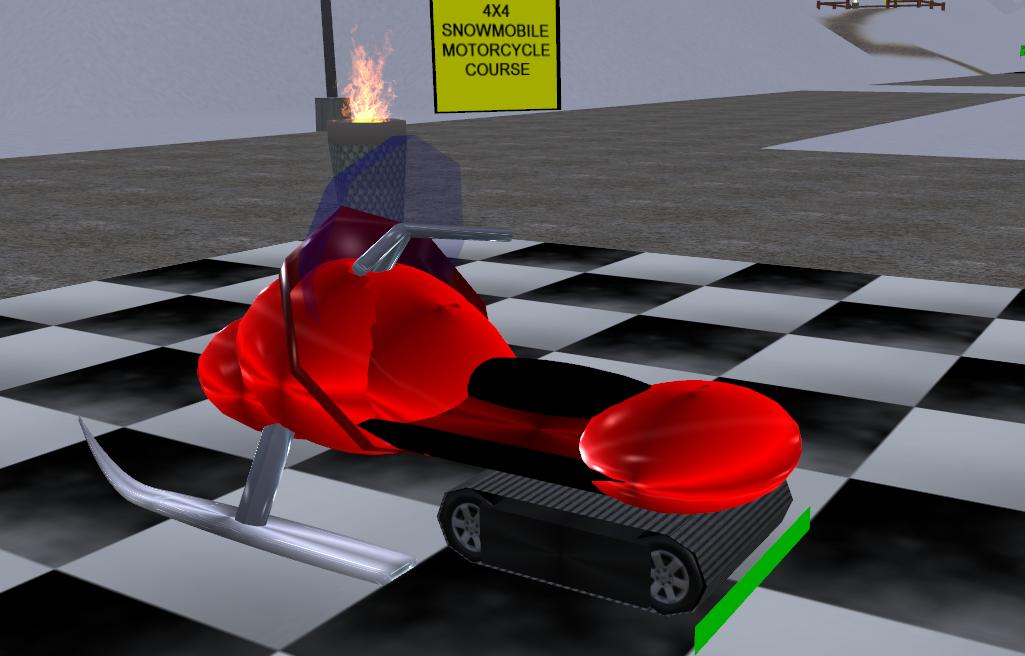
| 12. copying a mover as an .awg-file |
| When exploring , you will find a lot of nice mover creations with multiple objects and made with standard objects, and if you are in a building world (Alphaworld, AWTeen, Winter, Yellow, AWReunion), you will be able to copy these movers and bring them to your own building scene. |
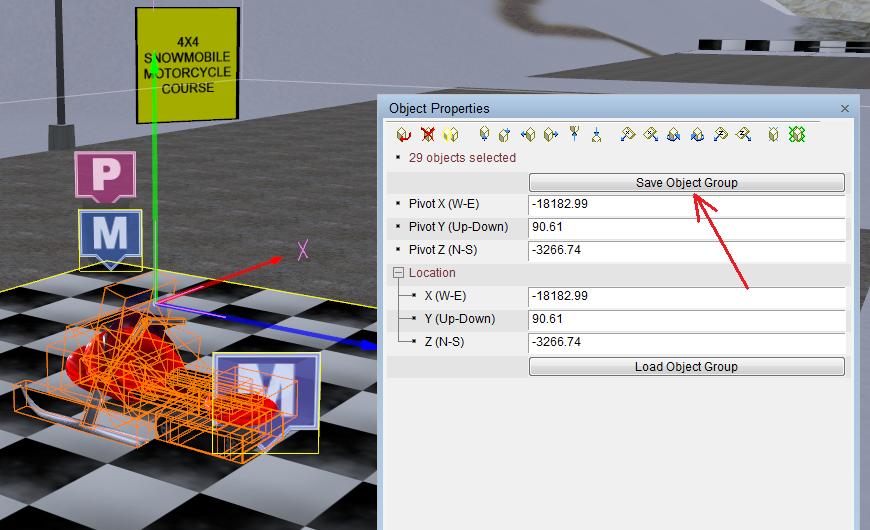
| In this example we have found this snow scooter in the world Winter op position 327S 1820E 10A. And we copy the scooter : press the CTRL-key and select 1 object of the scooter, so that the whole scooter is selected, including all the objects which are located on the same cell. Now deselect the objects which are not a part of the scooter: press the SHIFT key and deselect the floor object and also the mover in the corner of the floor. Then click upon "Save object group". |
| Now the "Save object group"-window appears with presets. You will also find in this window the CAV presets for your avatar. But now you save this mover and you just need to give a filename e.g. scooter and this will be saved as an -.awg-file , |
| Now you go to your building scene and you create an object (any object is good, e.g. aplic1.rwx ) ,but with the purpose to change it into the snow scooter. So put the model at ground level. Right-click upon the object, and select the object properties. There you click upon "Load object group" |
| Now the "Load object group"-window appears with the presets. Select the scooter.awg - file and click upon "open file" ,and the scooter will load into the building scene. If the building scene is in Winter world, then there is no problem. If you copy the mover set into another world, then you must be lucky that all the object parts of the mover as also included in the object path of that world . |
| Copying movers as awg-files is often applied, but also for copying groups of objects. Some citizens post their awg-creations on forums for downloading. There also exist awg-yards , just save the creations you want and store them as awg-files. World owners with their own object path can upload these awg-files and store them in the map "groups" . The advantage is that group objects are considered as 1 object instead of eg. 25 objects, but disadavantages are that you cannot rotate, move, scale the group object or retexture some parts of the group object. |
|

|
|
|
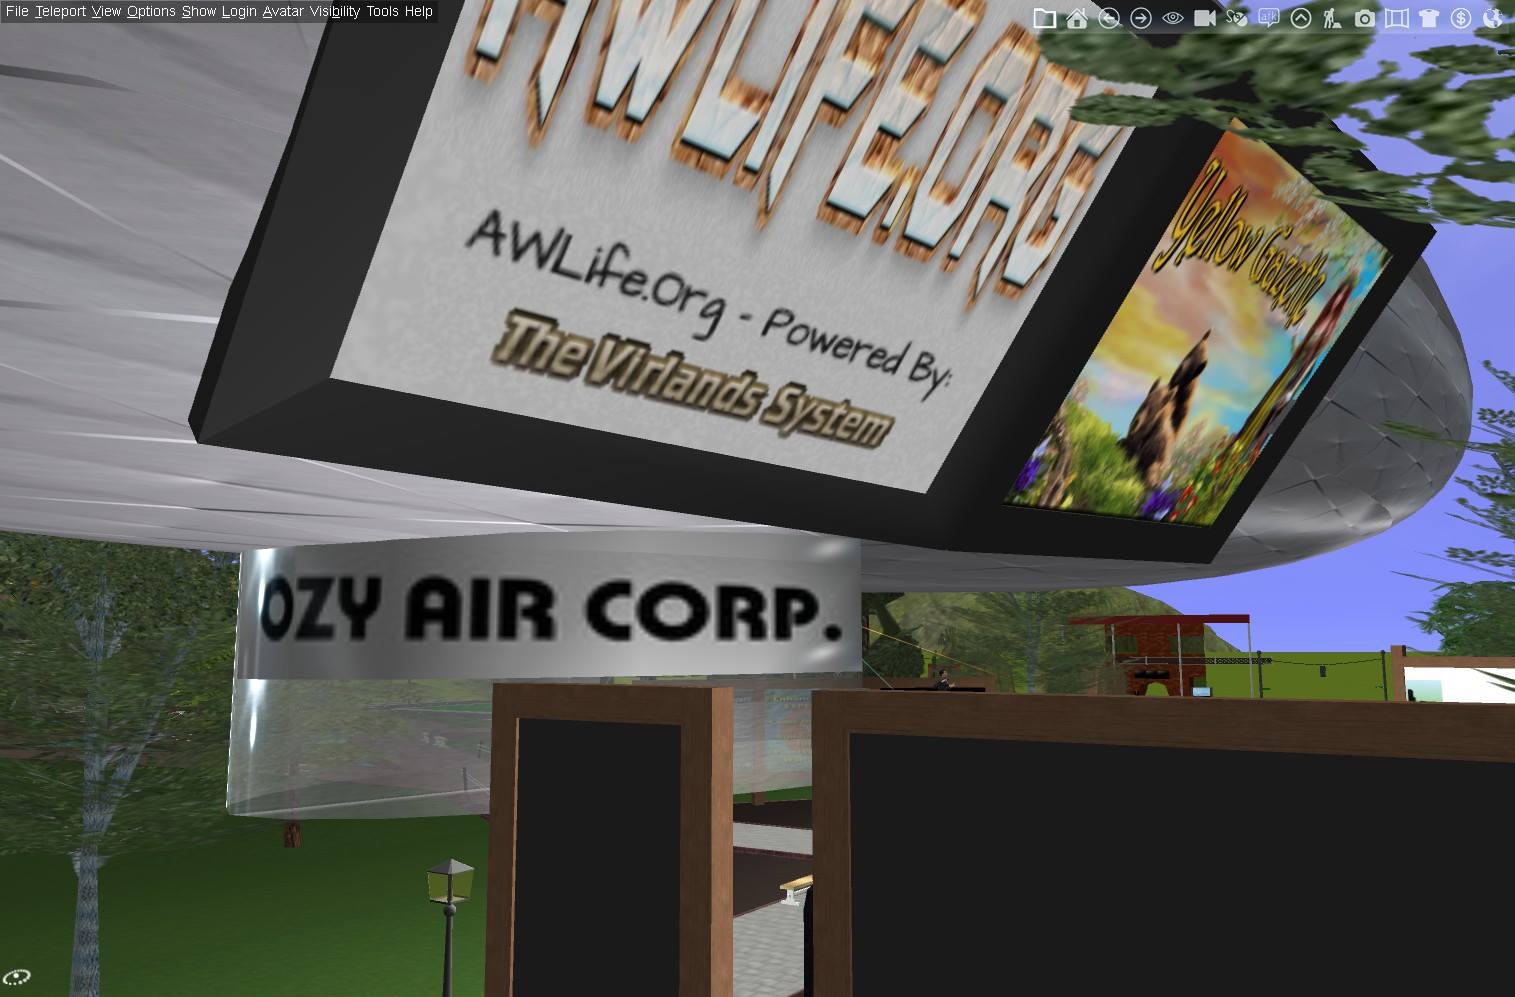
A well-known multi-object mover is the zeppelin made by Ozyseo. This mover is larger than the limit of 10 meters, but by using the scale command, the center of the linked objects remain within 10 meters of the cental mover object. There already exists a zeppelin in the standard object path, but with that object you can only add 1 advertisement. Here it is easy to use several advertisements for each linked pict-object. |
| You can find the Ozyseo's zeppelin mover in AlphaWorld 7747S 1407E and it consists of only 31 objects (without the picture panels). |
| Another well-known mover is the trolley of TenYearsGone which is used in Happy Valley but also in the AWExpo zone (e.g AlphaWorld 7726S 1403E ). This multi-object mover is used as a server controlled mover. |
|
 |
|
|
 |
|
|


